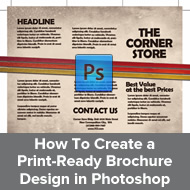
How to Design A Typographic Brochure – Photoshop tutorial
Typography can be applied to more than just posters. Other printed materials can also be infused with typographic elements easily to great effect. In this guide, you will discover how to design typography brochures. Let us get started.
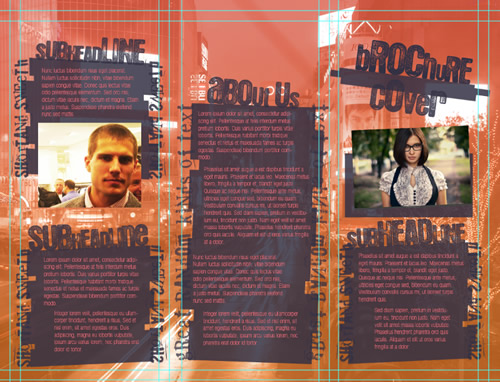
Final image
Step 1
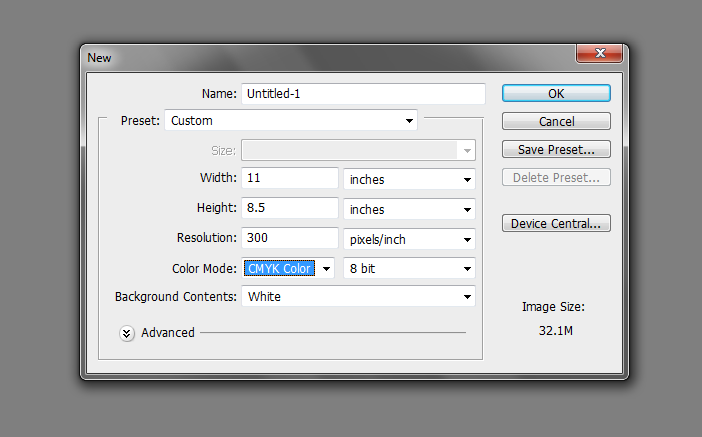
To get started, we will create a proper brochure document set for printing. Once you open a new document in Adobe Photoshop, you will want to set the width, height and resolution values appropriately for printing. For our initial document we use the values below. Take note that you can adjust this depending on what kind of brochure you plan on using.
- Width: 11 inches
- Height: 8.5 inches
- Resolution: 300ppi
- Color Mode: CMYK
Step 2
Next, we shall add in some guidelines. There are two sets that we want to put up. The security guidelines and the bleed. First we create the security guideline. To start, make sure that the rulers are visible. If they are not, press CTRL+R. Once they are, create guidelines by clicking and dragging your mouse cursor from the rulers into the design. Count approximately 0.25 inches from the edges of the document to place the guidelines.
Step 3
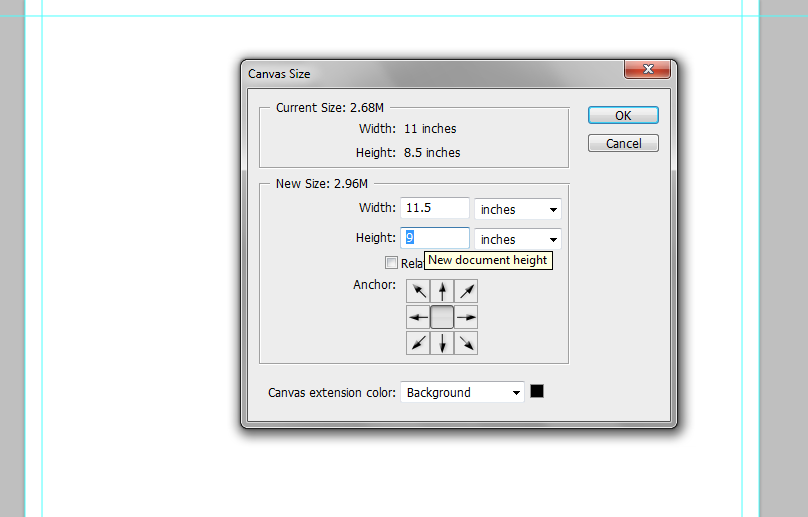
Now, also add in a set of guidelines RIGHT AT THE EDGE of the document. This will be the bleed guidelines. Then go to Image -> Canvass Size… Add 0.5 inches to the width and height value. This will become our bleed area. Make sure the anchor is set to center. Once done click on OK.
Step 4
That should give us the main print design with the bleed. Next, we will have to divide our brochure in three to create a trifold brochure. To do this in correct scale, first create a colored rectangle using the rectangle shape tool. Note that the color does not really matter, it must just be visible. Create the rectangle so that it spans the height of our design, right up until the bleed guidelines only. The width really does not matter.
Step 5
Duplicate the rectangle 2 times. Just press CTRL+J two times to do this. Position the rectangles side by side and just change their colors to be clear on their divisions. Once done, select ALL rectangles and press CTRL+T. The transformation box should activate. You can then scale their width to span the whole design, right up until the bleed lines.
Step 6
Afterwards, you can then add the guidelines for the folds of our trifold, right between those rectangles. Once done, you can delete those rectangle layers as they are not needed anymore. You might also want to add a 0.25inch security guideline from these fold lines as a margin for your design elements. In the end, we should have something like this as our main brochure template:

Step 7
Now, our first move is to add our watermark for our brochure design. For our example we got this nice image of the Shibuya crossing from a generous person in flickr (http://www.flickr.com/photos/keitaro/2128660654/sizes/l/in/photostream/). We just copy and paste it into our design.
Step 8
Now, we create a new layer on top of our watermark layer. Just use the CTRL+SHIFT+N shortcut to create the new layer. We name this new layer “Color layer”. Then, using the gradient color tool, we splash in a color gradient across the whole layer. In this case we used two theme colors in a linear style gradient.
Step 9
Then, change the blend mode of this layer to “Color”. Afterwards, reduce the opacity to 75%.
Step 10
Then, we click on our original watermark image. Reduce this layer’s opacity to 60%. Also make sure that you have a white background as the bottommost layer. If not, make sure you pour in some white color there via the pain bucket tool.
Step 11
Great! Now we are ready to put in some text boxes. Now for a more modern style, plain straight boxes will not do of course. In our example, we used the rectangle shape tool to stack in several rectangles in the stack for the middle panel. We just created one rectangle after another, stacking them up in odd angled and alignments. We also selected all those rectangles and then tilted them a bit via CTRL+T transform.
Step 12
Next, we merge all those rectangles into one by selecting them, right clicking on them and choosing the “Merge layers” option in the context menu. We then reduce its opacity to 85%.

Step 13
We then just duplicate the process for all the text boxes that you want. Just make sure you vary the sizes and angles.
Step 14
Great! Now is the time to add our typography style! To make this work, you need some great font styles. So make sure that you download a lot of creative fonts from free font sites like dafont.com. You might also want to try out some free creative fonts like in here: (http://www.misprintedtype.com/v4/). Once you are ready with your fully creative font styles, you can then add the typography elements. First start with your headlines. In our example we place the headlines and subheadlines on top of our text boxes. Moreover, we vary their font size and even font style to add a more creative effect.
Step 15
Next we add more text a design accents. Using the text tool, we type in a line of text with a more grunge like font. Then we rotate it vertically to act as part of the border of our text box. We apply this to all the text boxes.
Step 16
Then, we just add the body of the text content for our brochure within the confines of the text boxes. For this text section, it is best to use cleaner, easier to understand font sans serif styles as they will be smaller. Moreover, to create a more typographic theme to our design, it is good make the lines more closer together, with paragraphs blocked together, just like you see in the design below.
Step 17
Of course, it is also better to add images to brochures. Just copy and paste in the images that you want to use for the brochure. Do not forget to scale them properly by pressing CTRL+T and then just increasing or decreasing the size. Make sure you transform them in proportion by holding the shift key as you resize them. For our example, we got our images from these flicker sources:
- http://www.flickr.com/photos/darwinbell/267839735/sizes/o/in/photostream/
- http://www.flickr.com/photos/dmsumon/6785898422/sizes/l/in/photostream/

Step 18
That should finish our Outer, Front design. Note that the rightmost panel is our cover of course, the middle panel is the back of the brochure and the leftmost is the flap. Save this document as your front design of course by pressing CTRL+ and entering a filename.
Step 19
Then, we just process the back just like the front. Make sure you save this new back or inner part as well to be sure you have the back to back brochure that you need. We also got an extra image from here (http://www.flickr.com/photos/agnes-jr/6940494750/sizes/m/in/photostream/) as well in flickr.
Step 20
Great! With that, you are now finished with both the front and the back designs. Congratulations!