Socialize Your WordPress Blog without Using Plug-ins
There is a plug-in for each requirement for WordPress. However, it does not worth always to add a plug-in? For example, Google Inc. launched Google Translation and you have a plug-in for it from a third-party developer. This has limited functionality unlike Google API. Take another scenario – Facebook provides Facebook Connect for Websites and it’s easy to integrate to your blogs. However, there are paid plug-ins available for this work. Do you like paying for plugins or using ones with limited functionality even when you are using free and fully functional WordPress CMS? Why to use plugins with limited functionality when we can get feature rich APIs for free from the original manufacturer itself? It takes only minutes to integrate famous social networks to your blog. In this article, we will illustrate the steps to manually integrate the social media features to your WordPress blog.
Go Google
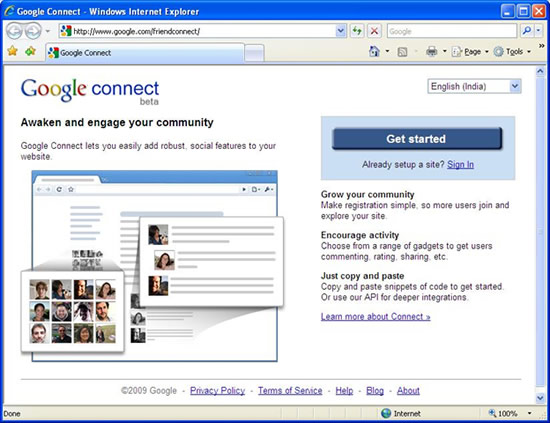
Google recently launched Google Friend Connect. This allows the visitors to login at your WordPress Website using their accounts of Google, Yahoo!, Twitter, AIM, Netlog, and OpenID. You can easily submit your Website at Google Friend Connect by visiting google.com/friendconnect and click blue ‘Get Started’ button.
Google Friend Connect: A Google Imitative
The Google Connect asks you to login with your Google Account. You can create a free account or use an existing Gmail or any other Google account. Please remember that Google Account will be shown on your Website when you add any gadget to it. Login and then fill in the form to continue.
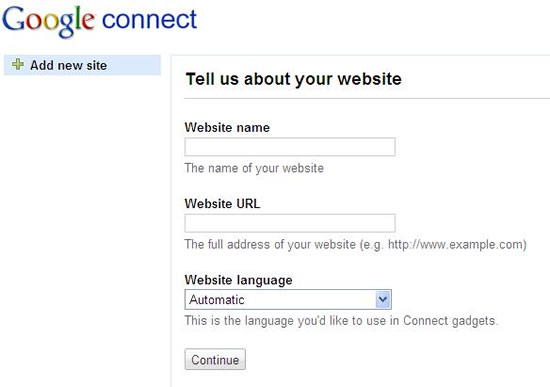
Adding Your Website at Google Connect (Courtesy: Google Friend Connect Website)
Click on Continue and this will add your Website to Google Friend Connect. Now, you can start creating the Google Gadgets and integrating them to your Website. Click on the big blue button -‘Add the members’ gadget’. This will show a Web page with three easy steps to customize your gadget, preview the changes, and then get the code added to your Website. After necessary modifications, click the button “Generate Code” in third step. Copy this code and leave the browser window open. Click here to add any generated/manually created HTML code to a Widget in WordPress.
After adding the code, the Google Friend Connect will look like this on the home page your Website: –

Google Members Gadget Screenshot (Courtesy: Google Friend Connect Website)
Now, come back to the browser window showing Google Friend Connect.
Click on the Gadgets option in the left hand sidebar and then click ‘All Gadgets’ Tab. This will show all the Google gadgets. You can follow the above steps to add these gadgets to your Website. We have listed the most prominent gadgets below.
- Sign In – smaller version of Members Gadget.
- Social Bar – shows the Google Social bar either on the top or at the bottom. Insert its code in atappropriate location either in header.php or in footer.php.
- Comments – allow users to leave comments.
- Rating & Reviews – allow users to rate and write reviews about your Website and posts.
- Interests Poll – Use it to open a poll at your Website and ask users’ opinion.
- Recommendation – allow users to recommend the articles on your blog and view what others haverecommended. This has two parts one is ‘Recommend It’ button and other is ‘Recommendation Gadget’. You can insert the code of ‘Recommend It’ button in single.php orloop-single.php of your theme.
- Featured Content – highlights the content from your Website based on the recent visits.
- Activities – shows the recent activities of Google Connect users.
- Newsletter Subscription – allows users to sign up with the subscription service, but the site ownerhas to send the newsletters manually.
- Event – Use it to highlight an event organized by our Website or user community.
- Recent Visitors – shows the most recent visitors to your Website.
- eBay Social Shopping (eSS) – allows the users to share their eBay shopping experience and recommendthings to buy from eBay on your Website.
Face the Book
Now, let us take you to a new world of facing the book means adding Facebook to your Website without plug-in. Login at your Facebook Account and visit developers.facebook.com. Click on the green button saying ‘Add Facebook to my Site’. This will show all the options available for your WordPress-powered Website from Facebook. Click on the ‘Core Concepts’ link in the left hand sidebar and then click ‘Social Plugins’. This lists the Facebook social plugins to be added on your Website.
Click on the ‘Like Button” and this will show step-by-step process to add Facebook Like Button in your posts. We suggest entering any anonymous information in ‘URL to like’ box like abc etc. Customize the look of button and click ‘Get Code’. Copy the iframe code and paste it in Notepad. Replace the URL in href attribute with following get_permalink function. This will add the current Page URL in the Facebook Like Button Code.
<?php echo get_permalink();?>
Your code will look like below:
<iframe src="http://www.facebook.com/plugins/like.php?href=<?php echo get_permalink();?> &layout=button_count&show_faces=true&width=450&action=like&font=arial&colorscheme=light&height=21" scrolling="no" frameborder="0" style="border:none; overflow:hidden; width:450px; height:21px;" allowTransparency="true"></iframe>
Now, paste this code in the single.php or loop-single.php file of your theme. This will show the Like Button in the Posts. In the similar way, you can add other social plugins (listed below) and tools from Facebook to your WordPress Website.
- Activity Feed – displays recent and interesting activities on your Website.
- Comments – allowsFacebook users to comment.
- Facepile – showsprofile pictures of the users who have either signed up or liked yourWebsite.
- Like Box – shows thepictures of users who liked the related pages or your Website.
- Live Stream – allowsusers to share comments and activities on real time basis.
- Login Button – allowsusers to login to your Website.
- Recommendations – shows users’ recommendations about your Website.
Tweeting
Now, it is the time to integrate Twitter, its Tweet button, and other gadgets in your WordPress blog. Sign in to Twitter with your credentials and then visit dev.twitter.com . Click on the Tweet Button and this will show the steps to add Tweet button on your blog posts. Customize the options and copy the code. You can add this code in single.php or loop-single.php.
Now, visit Twitter Widgets Page and click on My Website link in the left sidebar. You can add following Twitter gadgets to your blog.
- Profile Widget – displays the recent Twitter updates on your blog.
- Search Widget – searches the Twitter for entered keywords anddisplays results.
- Faves Widget – displays the favorite tweets only.
- List Widget – displays the favorite tweets in a list.
You can click on any widget, customize it, and then add to your WordPress blog.
Create a Widget from the Source Code in WordPress
We recommend you pasting this code in the Text widget of the sidebar. Login at the Dashboard of your WordPress-hosted Website, and go to Appearance Sub Panel>Widgets.
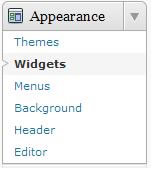
Widgets option in Appearance Sub-panel (Courtesy: Codex WordPress)
Select the Text Widget in the Available Widget Section and drag it to any section of Widget Area in the left hand side.

Text Widget for Arbitrary Text or HTML (Courtesy: Codex WordPress)
Enter a name of the widget, say “Google Friend Connect” in Title and then paste the code in the box.

Adding Google Members Widget in Text Widget
What to add and where?
You must know the place where you have to enter the source code to add any feature. We recommend adding:
- the gadgets like
- Twitter Widgets (except Twitter Tweet Button),
- Google Gadgets (except Sign In, Social Bar, Google Recommend It Button), and
- Facebook Social Plugins (except Like Box and Login Button)
in the Text widgets of Sidebar/Header/Footer in Dashboard>Appearance>Widgets section.
- Twitter Tweet, GoogleRecommend It, and Facebook Like Buttons in the single.php orloop-single.php file of your theme.
- Google Social Bar eitherin header.php at top or in footer.php on the bottom.
- Google Sign In andFacebook Login Button in header.php file at the top.
Now, you know how easy it is to add the Social Media features without using third-party plugins. These simple techniques not only reduce the bandwidth load but also optimize the performance of your Website. You just have to navigate the targeted social media Website and try to find the source code to add its options in your Website. Try this and tell us if you face any problem in the same. Stay tuned for more updates on social media features!